
When the chill of winter infects your conservatory, fitting an electric radiator becomes not just an accessory but a necessity. Here’s our step by step guide to fitting and installing your electric radiator, ensuring you can enjoy your conservatory year-round in cosy warmth.
Step 1: Choose the Right Radiator
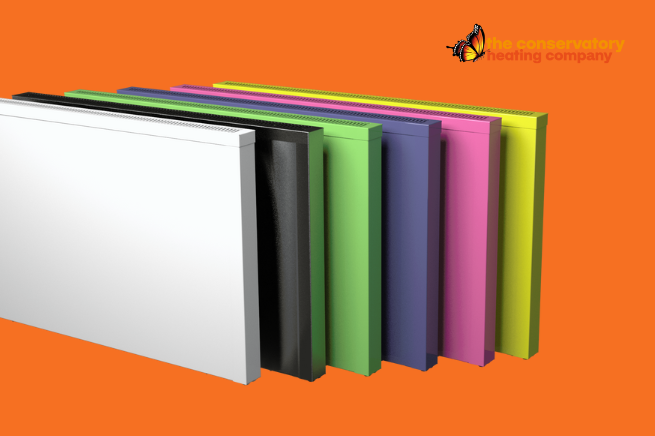
Before installation, it’s crucial to select a radiator that suits the size of your conservatory. You can use our online calculator to work out the amount and size of radiator needed to heat your conservatory, sun room, garden room or extension.
Step 2: Decide on the Location
Selecting the prime position for your electric radiator is both a matter of heating efficiency and practical placement. Typically, the coldest wall of the conservatory—usually next to external doors or windows—is the most strategic spot. While deciding on the location, it’s paramount to consider the electrical supply. The electric radiator installation itself should be within a reasonable distance from a power socket or junction box, ensuring that the access to these electrical points is not obscured.
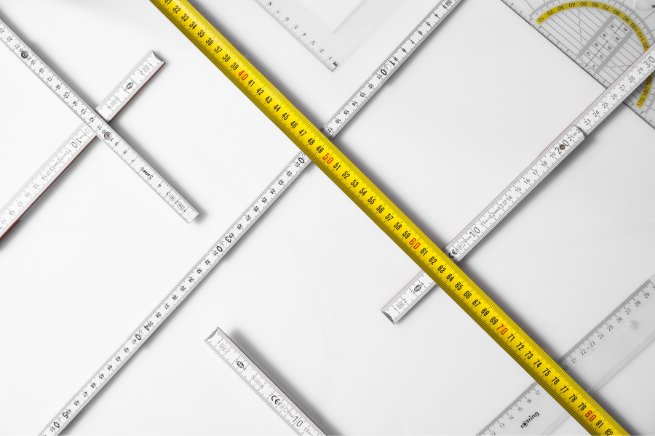
Also imperative is the space around the radiator: a minimum of 10cm (4”) of clearance is needed below the lower edge of the radiator to allow for proper airflow and heat circulation. Similarly, maintain a 10cm (4”) clearance between the radiator and any windowsills or overhangs above to prevent heat from causing damage or becoming trapped, which could reduce the radiator’s efficiency in heating up. Moreover, there should be at least 30cm (12”) of clearance above the radiator to any other electrical installations to comply with safety standards and facilitate effective heat distribution. These clearances are crucial to ensure that the radiator operates safely and efficiently within your conservatory space.
Step 3: Mounting the Brackets
The installation of your electric radiator requires precision to ensure it’s both aesthetically pleasing and safely installed. Begin by removing the lid from the radiator. Turn it upside down and rest it atop the skirting board against the wall. This will help you to locate the exact points where the brackets will be attached.
Using a pencil, carefully make two marks on the wall that align with the notches on the underside of the lid. These marks are where you will eventually place the support brackets that hold the radiator. To ensure that your markings are vertically aligned, place a rail vertically with one edge centred over each notch mark, and then draw a straight line along the rail. At this stage, it’s wise to use a spirit level to verify that your lines are perfectly vertical.
With your vertical lines in place, align the rail against the wall, ensuring that the pencil lines are visible through the rail’s holes. This will guide you to mark precisely where you need to drill. Once you’ve marked these spots, you can securely fasten the support bars to the wall, ready to hold your radiator in place. It’s vital to ensure that these supports are fixed solidly; the safety and stability of your radiator depend on it.
Step 4: Hang the Radiator
With the support bars securely fastened, you’re ready to mount the radiator itself. Start the job by inserting the wider bottom hooks into the lower slots of both support bars, ensuring they click into place and are stable. These hooks will bear the majority of the radiator’s weight, so it’s crucial that they are installed correctly.
Now, with a careful grip, lift the radiator. It’s important to keep the unit balanced and central as you position and install it onto the lower support hooks that you’ve just installed. Ensure that the radiator sits evenly on these hooks before proceeding to the next step.
With the bottom of the radiator secured, tilt the top part of the radiator slightly away from the wall. This will allow you to insert the slimmer upper hooks into the corresponding upper slots on the support bars. Once the hooks are in place, gently shift them to the side, aligning them for the final step of mounting.
Now, carefully move the top of the radiator towards the wall. As you do this, lift the upper hooks slightly so that they catch onto the ribs at the top of the radiator. It’s a delicate balance between tilting and lifting; you need to ensure the hooks engage securely with the ribs designed to hold them.
After the radiator is firmly mounted on both the upper and lower hooks, it’s time to replace the top panel. Fit it neatly into place to conceal the fixtures, providing a clean and finished look to your installation. This not only adds to the visual appeal but also ensures that no fixing elements are left exposed for safety and design integrity.
Step 5: Electrical Connections
For the electrical connection, you have two main options:
Plug-in: The simplest method is to plug the radiator into an existing plug socket. This method is DIY-friendly and requires no special tools or electrical knowledge.
Hardwiring: Alternatively, you may opt for a cleaner look with a hardwired connection. This job should only be performed by a qualified electrician to comply with UK electrical regulations.
Step 6: Programming Your Radiator
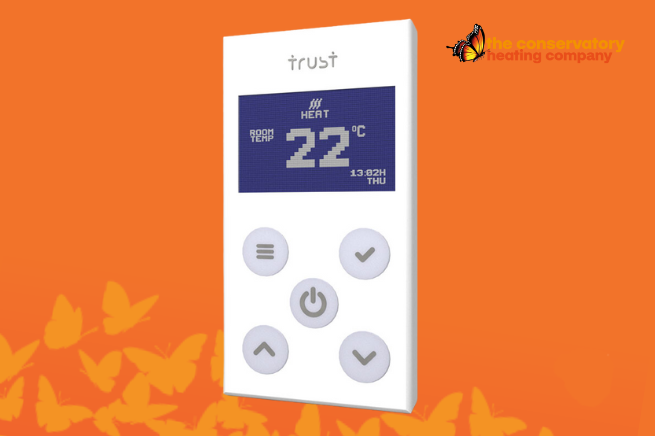
Our electric radiators come with the convenience of programmable timers and thermostats, designed to adapt to your individual needs. Spend some time getting to know the control panel to tailor your heating experience effectively.
To set the date and time:
-
Press and hold the menu button for 3 seconds.
-
Navigate to ‘Set time’ and select it.
-
Use the up and down keys to adjust the day, then press ‘OK’.
-
With the same keys, set the time, and confirm by pressing ‘OK’.
For Temperature Settings:
In Automatic Mode:
You have the flexibility to create four different programmes for each day, or you can set one consistent programme template to repeat daily.
-
Hold the menu button for 3 seconds to enter the menu.
-
Choose ‘Time settings’ and confirm with ‘OK’.
-
To apply a uniform schedule, simply press ‘OK’.
For varied schedules:
-
Use the up and down keys to select individual days and press ‘OK’.
-
Subsequently, set the start/end times and desired temperatures for each period.
In Optimisation Mode:
This intelligent feature learns how long it takes to heat your room to the desired temperature.
-
Press and hold the menu button for 3 seconds.
-
Scroll to ‘Options’ and press ‘OK’.
-
Activate by selecting ‘On’ and confirm with ‘OK’.
In Manual Mode:
Should you need to adjust the heat outside of the programmed settings range, you can do so manually.
-
Simply use the up and down arrows to adjust the temperature during any active period.
-
Press ‘OK’ to temporarily override the automatic setting for that specific period.
By customising each mode to your lifestyle, you can ensure that your conservatory remains a comfortable retreat at all times while optimising energy usage. Remember, any manual adjustments made will revert back to programmed settings in the next scheduled period, maintaining your preferences without further input.
Step 7: Testing
Once installed and programmed, test the radiator to ensure it heats up and responds to the controls correctly. If you have any problems please contact us omn 0330 0557 503.
Step 8: Enjoy Your Conservatory
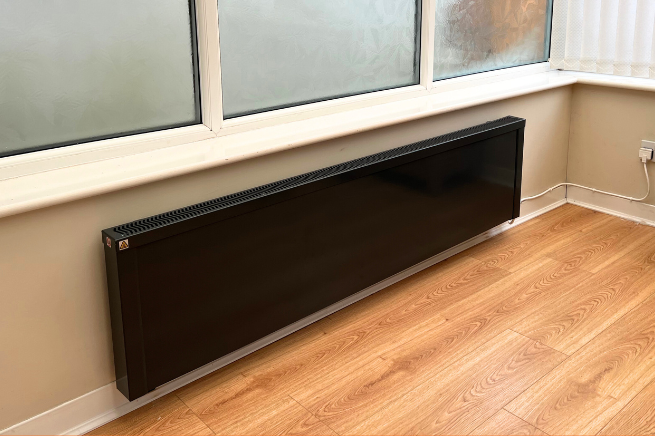
With your new electric radiator installed, your conservatory is now a snug retreat, even in the depths of winter.
Maintenance Tips
-
Regularly dust the back radiator with a duster or vacuum.
-
When the radiator is not in use and completely cold, wipe the radiator with a damp cloth. Don’t use abrasive cleaning powders or furniture polish.
-
Check the programming periodically to ensure it reflects your current needs.
Installing your electric radiator should be a straightforward process if you follow these steps carefully. Should you need any assistance or professional advice, our team at the Conservatory Heating Company is always ready to help. Stay warm and enjoy your conservatory in all seasons!
- Share this:

